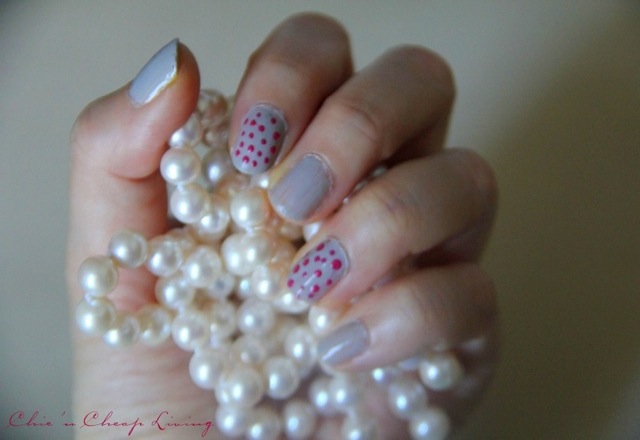
Sometimes fashion inspiration comes from the most unlikely places – in this case, it came from a 3 year-old!
I was trying to entertain my nieces and give them these manicures a year or two ago (for a perfect, at home manicure, see my previous tutorial here). They still needed some entertaining time before dinner so I decided to liven up their manicures and put on a very simple design – polka dots! I grabbed a sharp pencil (there were no thin nail polish brushes around) to put on the dots and loved the cute results! I adore this manicure for myself for the same reasons that I loved them on my nieces – it is simple, whimsical, and adds a great contrast between two colors.
So grade schoolers and adults can be chic!

Here are the materials you need to create your manicure:
- base coat
- top coat
- 2 shades of contrasting nail polish
- 1 item with a sharp tip (sharp pencil, pin, etc.)
- wax paper (or a regular page from a magazine you won’t be reading anymore!)
Here are the steps I used to create this manicure:
1. I painted my nails in the base coat and then two coats of one color (with sufficient drying time between each layer of course!)
2. I put a few drops of nail polish on the wax paper and then dipped my pencil tip into the nail polish. Be careful not too put too much nail polish on at once or else it will be difficult to work with since it thickens/dries slightly quickly!
3. I drew in dots of varying sizes. I would try to go from the center and draw around the circumference of the first dot. If you have too much nail polish and are drawing a larger circle, you may get little nail polish lines when you lift up your pencil.
4. Allow sufficient drying time for the dots and then put on your top coat to keep your dots from smudging!


Too cute! I need that Zoya color 🙂
These are two of my favorite Zoya colors!
super cute! i really like the contrast in colors between the solid and dots 🙂
Aw, that is so cute! I am totally gonna try and be a bit more experimental when it comes to my nails. You have inspired me! xo
Yes, I am surprised by how much fun I have with my manicures now and it is so easy!
Love that, it’s so cute 🙂 xx
that’s definitely super cute and fun! i bet they were tickled pink!
http://www.averysweetblog.com/
LOVE it, I’ll have to try the pencil trick.
that’s a good idea for a way of doing that!
Love the colors and looks totally doable! 🙂
∞ © tanvii.com ∞
this is soo cute!! it conjures up images of kate spade adverts!! muhaha
i do have a WOC but truthfully i don’t use her all that often i tend to be a “big bag” girl hehe.. but it does come in handy when i’m running errands and grocery shopping 🙂
i forgot to add i have in fact seen the pink camelia flower one and that one is gorgeous if you are thinking about it i would get it it is really girly and pretty!
You are the biggest Chanel enabler! The camellia is too cute!
Dip the pencil tip on wax paper–duh! That’s such a great way to do the polka dots on the nails…love it.
Amazing mani ~ love it!
xoxox,
CC
Fun manicure!
I will out my polka dot phobia aside and agree that this does look super cute!!
Wow love everything about this. The colors are adorable together. And it’s such a simple, fun design. You make it look so easy. 🙂
Thank you! It is really fun and easy!
those came out great and are so cute! I never do elaborate mannis, as much as I’d like to, I’d be so upset as soon as they started to chip and I’d have to destroy all my hard work.
cute DIY!!
they came out great!
xo
MOSAMUSE
http://www.MOSAMUSE.com
this is SO fun!!! thank you for the tips – your dots have been one of the few “clean” looking ones i’ve seen yet. the colour combination is adorable too!! xox P
phiphisblog.com
Thanks dear! Yes I did try to be neat about the dots and a sharp tip really helps!
[…] see my previous tutorial here). They still needed some entertaining time before dinner […] Tweet Travel A perfect weekend afternoon activity for me is to sink into a good book on my Kindle (or […]
[…] 3. Then I draw on the little seeds by dotting my nails with the white color (see a tutorial for how to create a polka dot manicure here) […]